BREW GUIDE | Cupping with Lykke
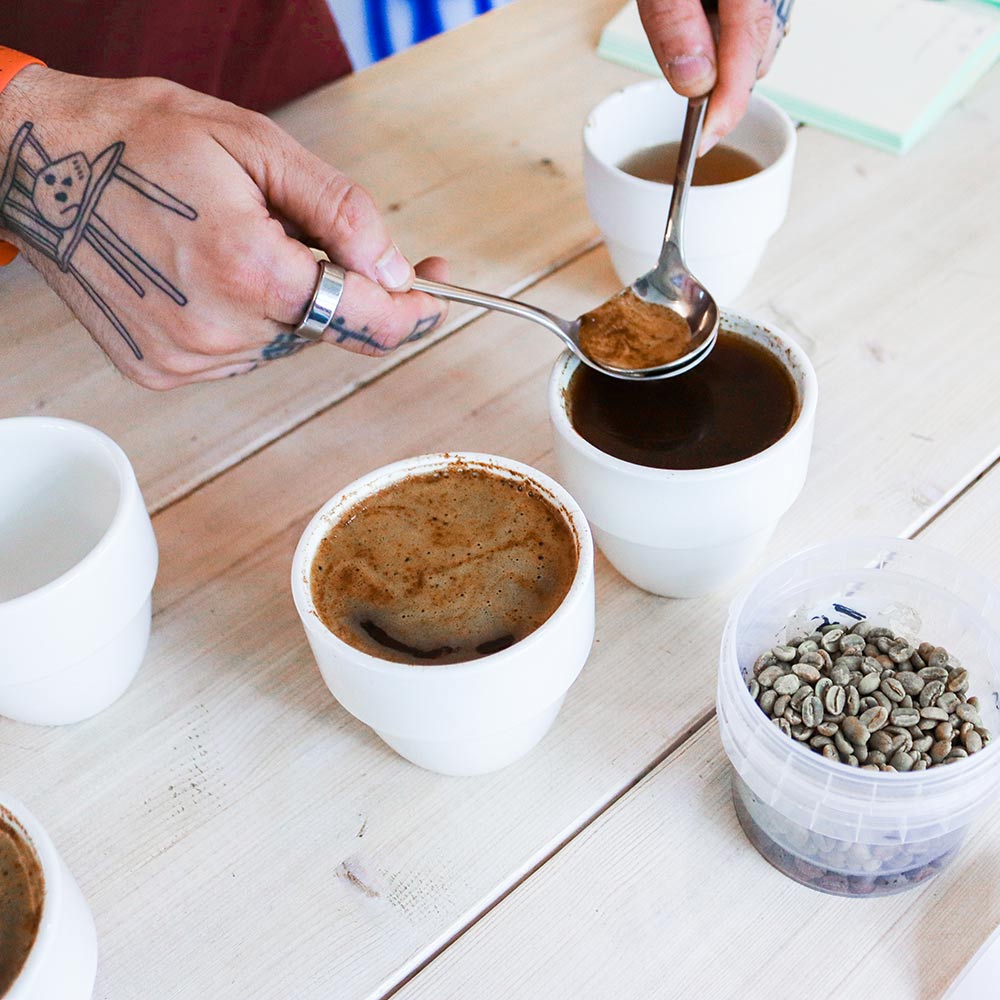

Coffee cupping, the age-old practice of evaluating and appreciating the flavours, aroma, and nuances of coffee, is an essential technique used by professionals and enthusiasts alike. It is a sensory journey that allows coffee lovers to truly connect with the intricacies of our beloved brew – but also the universal way of grading speciality coffee.
1. To begin your coffee-cupping journey, you’ll need a set of essential tools:
-Freshly Roasted Lykke Coffee Beans.
-Grinder: Invest in a quality grinder capable of delivering a consistent grind.
-Cups: Use standard cupping bowls or small ceramic cups.
-Cupping Spoons: Choose spoons with deep, round bowls to facilitate slurping and taste distribution.
-Water: Opt for fresh, filtered water at a temperature around 200°F (93°C).
-Tablespoons: Use for accurate measurement of coffee grounds.
-Notepad and Pen: Essential for recording your sensory observations during the cupping process.
2. Grind the coffee beans just before cupping to ensure maximum flavour retention. Use a consistent grind size, slightly coarser than the grind used for regular brewing methods. Measure approximately 8 grams of coffee grounds for each cup to maintain consistency.
3. Smell the aromas. Before pouring hot water over the coffee grounds, take a moment to inhale the subtle scents emanating from the dry coffee. Note any distinct fragrances, such as floral, fruity, or nutty undertones.
4. Pour the hot water over the coffee grounds, allowing them to bloom and release their unique aromas. Use around 12 grams of water for every gram of coffee. Start the timer and let the coffee steep for approximately four minutes, ensuring an even extraction.

5. Break the crust and smell again. With a spoon, gently break the crust formed by the floating coffee grounds on the surface. While breaking the crust, bring the spoon close to your nose and inhale deeply, discerning any changes in aroma or intensity.

6. Remove the crust. With two spoons, gently remove the crust by joining the spoons at the top of the cup, and then slowly moving the crust towards you. Scoop it up and dispose in a container.

7. Slurp and taste. Take a spoonful of coffee, allowing it to cool slightly, and slurp it into your mouth, ensuring it spreads across your entire palate. Pay attention to the flavours present, including acidity, sweetness, bitterness, and any specific notes that stand out. Evaluate the body or mouthfeel of the coffee, noting its texture and weight in your mouth.

8. Evaluate and Record. After each round of tasting, record your sensory observations. Use the notepad to jot down the flavour descriptors, intensity, acidity levels, and any other unique characteristics you identify. Don’t be afraid to trust your instincts and use descriptive language to capture your experience accurately.

9. Compare and contrast. Repeat the cupping process with different coffee samples, comparing and contrasting their flavours, aromas, and overall profile. Take note of the differences and similarities among the various beans, enabling you to develop a deeper understanding of coffee origins, roasting styles, and personal preferences.

